Thursday, January 21, 2010

Hooking with Yarn continued . . . (Jet Award)


I have completed hooking my project with yarn. For the border, I used a chunky yarn 100% wool in a charcoal grey. The chunky wool yarn hooked much easier with very little splitting unlike the 4 ply acrylic. Then on a scrap backing, I tried using a 3 ply 100% wool with a single strand and then with a double strand. It too hooked up easier than the acrylic yarn. If you choose to hook with yarn, my suggestion is to go for wool instead of acrylic. The wool texture is better and does not have a tendency to pull out or split. The acrylic was really not bad to hook with, but it does have a tendency to split (which is aggravating) and has a softer finish (which could cause it to pull out of the backing). However, I did love the look of hooking with yarn. It was interesting and different . . . a definite change of pace.

Here are some pictures to show the comparison of the size difference of yarns I used.

The darker spots on the hooking are from the ends of the yarn that were brought to the top and cut even (not as noticeable when looking right at it) . I'm making the hooked piece into a pillow to finish it.

Monday, January 18, 2010

Hooking with yarn for the Jet Award


Last night I started working on the Jet Award for the Merit Program. The projects for earning the Jet Award requires working with alternative materials. For my first project, I chose to hook with yarn. I have an abundance of left over yarn from knitting mittens for Christmas a few years back. The yarn is mostly 3 and 4 ply acrylic so the mittens would be easy to wash and I had a wide variety of colors.

To start my project, I drew a 12x12 inch square on some inexpensive burlap that I had and divided that into triangles. On my first two triangles, I used a single strand of yarn. The weave on the burlap wasn't quite tight enough and I had to go back occasionally and pull up a lost loop or two which made it time consuming. On the third and remaining triangles, I decided to double up on the yarn. It made the hooking so much easier and covered the area to be hooked much faster. I still had an occasional lost loop and sometimes the yarn would split which was a little aggravating, but I really liked the look. Here is a view of the back. It could be neater, but I was concentrating on the front more than the back.
There is a warning here to be VERY careful putting the hooked part on your frame. The gripping strips wanted to pull out the hooking when I tried to reposition my mat.

The project is going fairly quickly (this is what I have done since last night). I could see me making a small rug using yarn but with a tighter weave backing.
Here are a few pictures showing how I hook with it. I cut off a long length of yarn and folded it in half. I began hooking by pulling up the loop end, then I continued hooking pulling up two strands at a time. To finish, I pulled up the tails and cut them even with the hooking.


Wednesday, January 13, 2010

Finished Color Rug!


Just finished the binding last night on the Color Rug for the Merit Program. This rug has 6 of the projects required for the Peridot Award, each project is either 10x10 inches or 5x20 inches (total area each project 100 square inches for a sampler rug). I chose the following projects to hook in my rug: a color wheel, all primary colors, complimentary colors, tertiary colors, cool/warm colors, and an obvious balance color plan.
To begin, I measured off blocks on my linen and then drew a design for each category as I finished the previous one. All colors co-ordinated in some form or fashion because I dyed the wool with one color palette using April DeConick's "Palette Dyeing" method. It is amazing how the colors flow and blend together using this dyeing method. I was worried about how it would look to hook primary colors next to the other projects, but it doesn't seem to matter since all the colors are from the same family of dyes.
On the border are words that I learned about color, and when possible I hooked with the appropriate wool to demonstrate that word.

Value,
Tint,
Shade,
and Tone
are examples. The words for the 6 projects that I chose to complete the Peridot Award are next to the project. I also had room for my

secondary colors
and my neutrals.
Because I chose to do lettering in the border and binding my rug by whipping with yarn, I will get credit for two projects in the Ruby Award. And, by dyeing all the wool in this project using chemical dyes, I get credit for one project in the Amethyst Award.
I will now submit my rug and descriptions to the Merit program for review.

Saturday, January 9, 2010

Neutrals, Tones, and Shades (Palette Dyeing)


In the past week I have been dyeing more wool to finish up my Palette Dyeing. I am learning Neutrals (equal amounts of complimentary colors), Tones (color plus grey), and Shades (color plus black). It is so exciting to see the colors that are created using the color palette that I chose. This is a picture of my Neutrals; two values of red and green, two of blue and orange, and two of yellow and violet. Each is so unique.

Next are my Tones. I used a yellow-green in value #2 with 1/16, 1/8, 1/4, 1/2, and 1 tsp. of my grey dye mixture (grey dye used was Pro Chem Mouse Grey). The top swatch is the original color.

Here is what it looks like on my Color Rug.

Last are my swatches of Shade. I used value #2 of red-orange with 1/16, 1/8, 1/4, 1/2, and 1 tsp. of my black dye mixture (Pro Chem Black). The first swatch is my original color.

Here is what it looks like in my rug.

I really thought that dyeing Neutrals, Tones, and Shades would be boring but I was quite surprised at the results. I really like the Shades and can see where it would add a lot of depth to hooking a rug.

Sunday, January 3, 2010

Continuing on with the Color Rug . . .


I am continuing to hook on my 'rug of color' for the Peridot Award. The border is almost finished, I do want to make some changes, however. I worked my initials in the neutral colors from my "Palette Dying", but it looks out of place so I will re-hook them using a color with the blue-green border background. That will be more consistant. (If you want a laugh, look closely at my initials. I hooked them upside down and got the 'J' backwards. Think before you hook!) Also, I haven't dyed the wools for the "TONE" and the "SHADE", so the lettering will be pulled out and re-hooked using wools dyed for those words.
It took me forever to decide what to hook for the 'balanced' part of the rug. It is so darn narrow nothing seemed to work. My husband suggested hooking a neck tie . . . it is long, I could make it colorful . . . but it didn't go with the rest of the rug. I'm going with a kind of patch work quilt thing and have a "Georgia Peach' in the center squares.
I'm sure hoping to have this thing completed in the next few weeks!

Tuesday, November 10, 2009

Tertiary Colors (Merit Program) Peridot Award


I just finished hooking my tertiary colors for the Peridot Award on the Merit Program. I decided to do proddy for my flowers mainly because I had just bought the book "Prodded Hooking for a Three-Dimensional Effect" by Gene Shepherd. It is a fabulous book AND it comes with a wonderful DVD. I enjoyed prodding so much that I prodded some flowers on a hooked purse I have been working on. (Hopefully the purse will be sewn together very soon).

For my tertiary project, I used at least one value of all of the six tertiary colors.

Hydrangeas used values 1, 2, and 3 of blue-violet (110).
The marigold is value 3 of yellow-orange (104).
The flower top left uses value 1 of red-orange (102) for the center and value 4 of red-violet (112) for the petals.
The flower bottom right is value 5 of red-violet (112) and the petals are value 5 of yellow-orange (104).
Leaves are a mixture of the first 6 values of yellow-green (106).
The background is value 1 of blue green (108).

I used a different method on my hydrangeas than in Gene's book on his delphinium. Gene knots each flower separately using a fine cut of wool, trims off the tail, and then places a drop of Fray Check on each knot. I took yarn and attached each flower with a french knot, just like one would in embroidery. My thought is that it would be faster (love that!) and perhaps a bit sturdier. I would like to put my rug on the floor occasionally and I think the flowers would be less likely to fall off using the french knots.

Tuesday, October 27, 2009

Re-visiting Complementary Colors


When I hooked the Complimentary colors, I was wanting a better transition on my background from values 5 to 4 and 4 to 3. I decided to dye two more values of the blue-violet calling them values 4 1/2 and 3 1/2 to see if it would make a difference in the transitions. To figure how much formula of dye to use, I divided the difference in the measurements between the two values by half (the difference of value 5 and 4 was 1 tsp. of formula, half of that = 1/2 tsp.). My total amount of formula for value 4 1/2 will now be . . .
1 1/2 (value 4 amount) + 1/2 (the extra amount)= 2 tsp. Complicated unless you have done Palette Dyeing, but I'm pretty sure that I think I know what I think I'm doing. Anyway, to compound the confusion and just because I'm cheap, I wanted only to dye half of the amount of wool normally used for one value. So, now for my 4 1/2 value I will be using 1/2 the wool and 1/2 of the 2 tsp. = just 1 tsp. of blue-violet dye formula. Was it worth the trouble? I don't know, you tell me . . .


It was a fun experiment. Maybe it made a slight difference, but I would always wonder if I hadn't tried it out. And, it gave me something else to blog about.

Sunday, October 25, 2009

Warm and Cool Colors (Peridot Award) Merit Program


On the Peridot Award, one of the choices is to hook a mat or 10x10 inch square in a rug of warm or cool colors. I asked permission to combine the warm and cool in one area of my rug as I thought it would be interesting to see the contrast between the two. I think it was very effective in my hooked butterfly. It was a challenge to choose the wool from my dyed palette of colors, but I came up with a combination that I liked. This is a picture of how the rug is progressing.


It will be a rug of the six chosen projects of the Peridot Award. As a plus, I will be using lettering in my border and finishing the rug which will count as two projects from the Ruby Award. Dying all the wool for this rug counts as one project for the Amethyst Award.

When I need more of a certain color for the rug from the color palette, I can determine which value I want and I am able to dye just that one value in the amount of wool that I need. Such will be the case when I hook the border of my rug. I will need about 3/4 of a yard of Blue-Green value #7. April DeConick has given a chart for us to determine how much of our formula to dye 1/2 and 1 yard increments of the values we need in her Palette Dyeing class.

For the next project, I will be trying some prodding.

Sunday, October 18, 2009

Complimentary Colors (Peridot Award) Merit Program


This is my example that I hooked of Complimentary Colors (colors opposite the color wheel) for the Peridot Award. I have used all 8 values of Yellow-Orange for the pumpkin and leaves and values 7 to 3 of Blue-Violet for the background. I am wanting a smoother transition on the background between values 5 to 4 and values 4 to 3, so I think I will dye a strip of wool in between those particular values and hook only one row using those new values (let's call them value 4 1/2 and 3 1/2). It will be interesting to see how much smother the transition will be.
Click on any photo to see pictures close-up.

Friday, October 16, 2009

Merit Program (Peridot Award) Primary Colors


My second project for the Peridot Award is to hook a 10x10 inch area using only primary colors. I have drawn three stars along with some stripes and have hooked red and blue stripes with yellow stars. I began with the darkest values and progressed to the lighter values on the stripes. With the stars, I used the 4 darkest values for the first star, the 4 middle values for the middle, and the 4 lightest for the last. So, I have hooked an area using only primary colors but using most or all of the values that I have dyed with my formulas.

I used ProChem dyes for my primary formulas.

My primary red formula is:
1 tsp. #307 Chinese Red
1/4 tsp. #304 Cape Cod Cranberry
1/16 tsp. #233 Bright Orange


Primary Blue:
1/2 + 1/16 tsp. #440 Blue
1/2 tsp. #495 Teal


Primary Yellow:
1 tsp. #119 Sun Yellow
1/2 tsp. #120 Golden Pear
1/32 tsp. #233 Bright Orange


All other colors in the color wheel were dyed from mixing these three formulas.

Tuesday, October 13, 2009

The Merit Program


I have been learning the Palette Dyeing process from April Deconick (Red Jack Rugs) on Rug Hooking Daily. I have now dyed eight values each of all 12 colors in the color wheel. So, having done that, I have decided to work on the the Peridot award for the Merit program. To do this I have chosen six of the eight projects and will be hooking them into one rug instead of doing individual mats. My first project was to hook the color wheel using the palette of colors. I have re-drawn my color wheel several times making a mess on the canvas before deciding to hook just plain 'ole squares. Not real creative on my part, but it got the job done. I wanted to show how subtle the color changes were from one color to the next, so I placed them next to each other without a dividing line or space. Above is my color wheel, below is my palette of colors . . . six dyed yards of values.

Snow Folks


I just finished a "Snow Folk". It is an adorable rug hooked snowman that I found the pattern and fabulous directions FREE on Jennifer Manuell's blog 'Fish Eye Rugs'. You can find her blog on my blog list, or to go direct to the "Snow Folks" click here. She has wonderful close-up pictures and detailed construction tips. Fun to make! She even gives instructions for the knitted hat. I suggest hooking several at one time. My tip for the snaps is to sew the bottom of the snap on first, then snap on the top part. The scarf is an old wool sweater that I felted and cut up. I made the trees from old bobbins using #8 cuts of wool tied in a single knot around the bobbin. I found the rusty old stars at Hobby Lobby in the Christmas department. Make one for yourself!

Sunday, September 27, 2009

Footstool is finished!


The footstool is now finished, not without removing and adding some hooking here and there. After sewing the corners and checking the fit, I found it to be too loose around, and that it was about a row or two short at the bottom. I had to remove the stitching from the corners, remove some of the hooking from the corner area, then add a row or two around the bottom to lengthen it. I re-stitched the corners together, folded the excess corner area to one side, and then turned up about a 1 1/4 inch hem. The hem was slip stitched to the back of the linen. It now fits snugly. To hold the slipcover in place, I sewed some yarn to the very bottom edge, wrapped it around each leg and stitched it to the bottom side edge. I did this several times to draw in the sides and to hold it in place.
PLEASE CLICK ON ANY PICTURE FOR A CLOSE-UP VIEW.


Draw a line for a 1 1/4 inch hem.


Zig zag or serge at hem line. Notice that I did not trim off the corners. I am leaving them intact. If ever I would want to undo the footstool cover, I could always go back and hook the corner area and make a rug mat. There is enough of the hem to whip an edge. This corner area is where I needed to pull out a row of hooking on either side to make the cover fig more snug.


Pin corner area.


I used yarn and I used a back stitched from the top corner down to the hem.


Check for fit. Here is where I discovered it was too loose and I needed to add another row all around the bottom. I had to remove the corner stitching to remove a row from the corner area (each side of corner). Notice a little of the corner area hanging out? Before hemming, I basted the corner edges to the hem and then turned up the hem.


Here is a close up of the bottom. To keep the slip cover on securely, I took a stitch at the hem, wrapped it around the leg, then attached that yarn at the hem on the side. Do this about twice and then pull the corner area together with a few stitches. I did NOT attach it to the footstool itself.


Another view. Nothing fancy here!


And here you have it!


Tuesday, September 22, 2009

Just having fun . . .


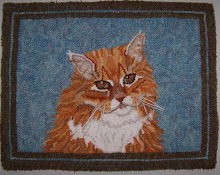
Due to all the heavy rains and flooding that Atlanta has been experiencing, I haven't been able to pick up my white wool needed to do palette dyeing from my rug hooking group. I only had 12 6x16 strips of creme wool and my primary color dyes re-figured for the umpteenth time, AND I was so very anxious to see what the secondary and tertiary colors would look like. So I spent the morning figuring out how much of the mixed dye from the primary colors I chose would it take to mix one value of each of the 12 colors. I'm certainly not a mathematician, but somehow I figured it out. It is amazing how the dyes mixed to make all the colors from my three primary dyes. This is value 4 of the 8 values. Also, this is Max the barn cat . . . who is no longer a barn cat, ever since he got kicked by a horse and broke his hip years ago. Max has decided he likes 'our' barn better than his.

Friday, September 18, 2009

Palette Dyeing

I am having so much fun doing the Palette Dyeing, I just wish I had more time in the day. I figure it takes about 2 1/2 to 3 hours start to finish (dragging out all the dye paraphernalia, dyeing the wool, and putting it all away again) to dye one set. If I didn't have to cook I would try to do two sets. I am working on finding my favorite blue, red, and yellow so I can start my color wheel. Here is a yellow I tried . . . I'm not using it because it is too brown for me, but it made a beautiful palette. It would be great for Sunflowers!