
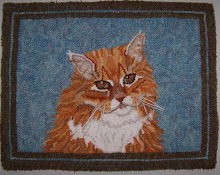


 This beautiful antique rug belongs to a friend of a fellow hooker of mine. It needed repair and I was asked if I could repair the hole and bind the sides like the top and bottom were bound. I have never done a repair before and it made me terribly nervous to even consider it. I read several articles from Rug Hooking Magazine, one of them found in September/ October 2004 and then got the courage to tackle it.
Accessing the damage front and back . . . (please click on the pictures to see larger pictures)

 The rug was hooked on burlap with different fabrics, not wool. I needed to remove some of the hooking far enough to find some good burlap to attach a new piece. The fabric that I took out was difficult to remove and it fell apart as I removed it making me even more nervous.
 The piece I attached was Scottish burlap, surged on one side. It goes about two inches below the removed hooked part as you will see on the back side.
 One row hooked to secure the piece. You can see my basting stitches. I used #8 wool strips as close to the background colors that I could find.


After the hooking was complete, I trimmed the excess (new) burlap and I turned back the surged edge twice then secured the edge by whipping.

The top and the bottom of the rug had been bound with binding tape that showed on the top side about 1/4 to 1/2 inch. It was faded so using new binding tape would show too much. I took new binding tape and boiled out as much black as I could using a little dishwasher detergent in the water. It took about 6 times of boiling before it stopped bleeding.
 The white line on the tape shows me where to sew to make the edge as even as I could. The tape was then flipped over and sewn to the back. Below are the remains of the hooking that I took out. Not much was left and very tedious to remove. The rug was worn and needed a good cleaning . . . by an expert cleaner who knows antique rugs!
Finished back repair.


Now that it is all over and done, I feel so relieved!


